Overview
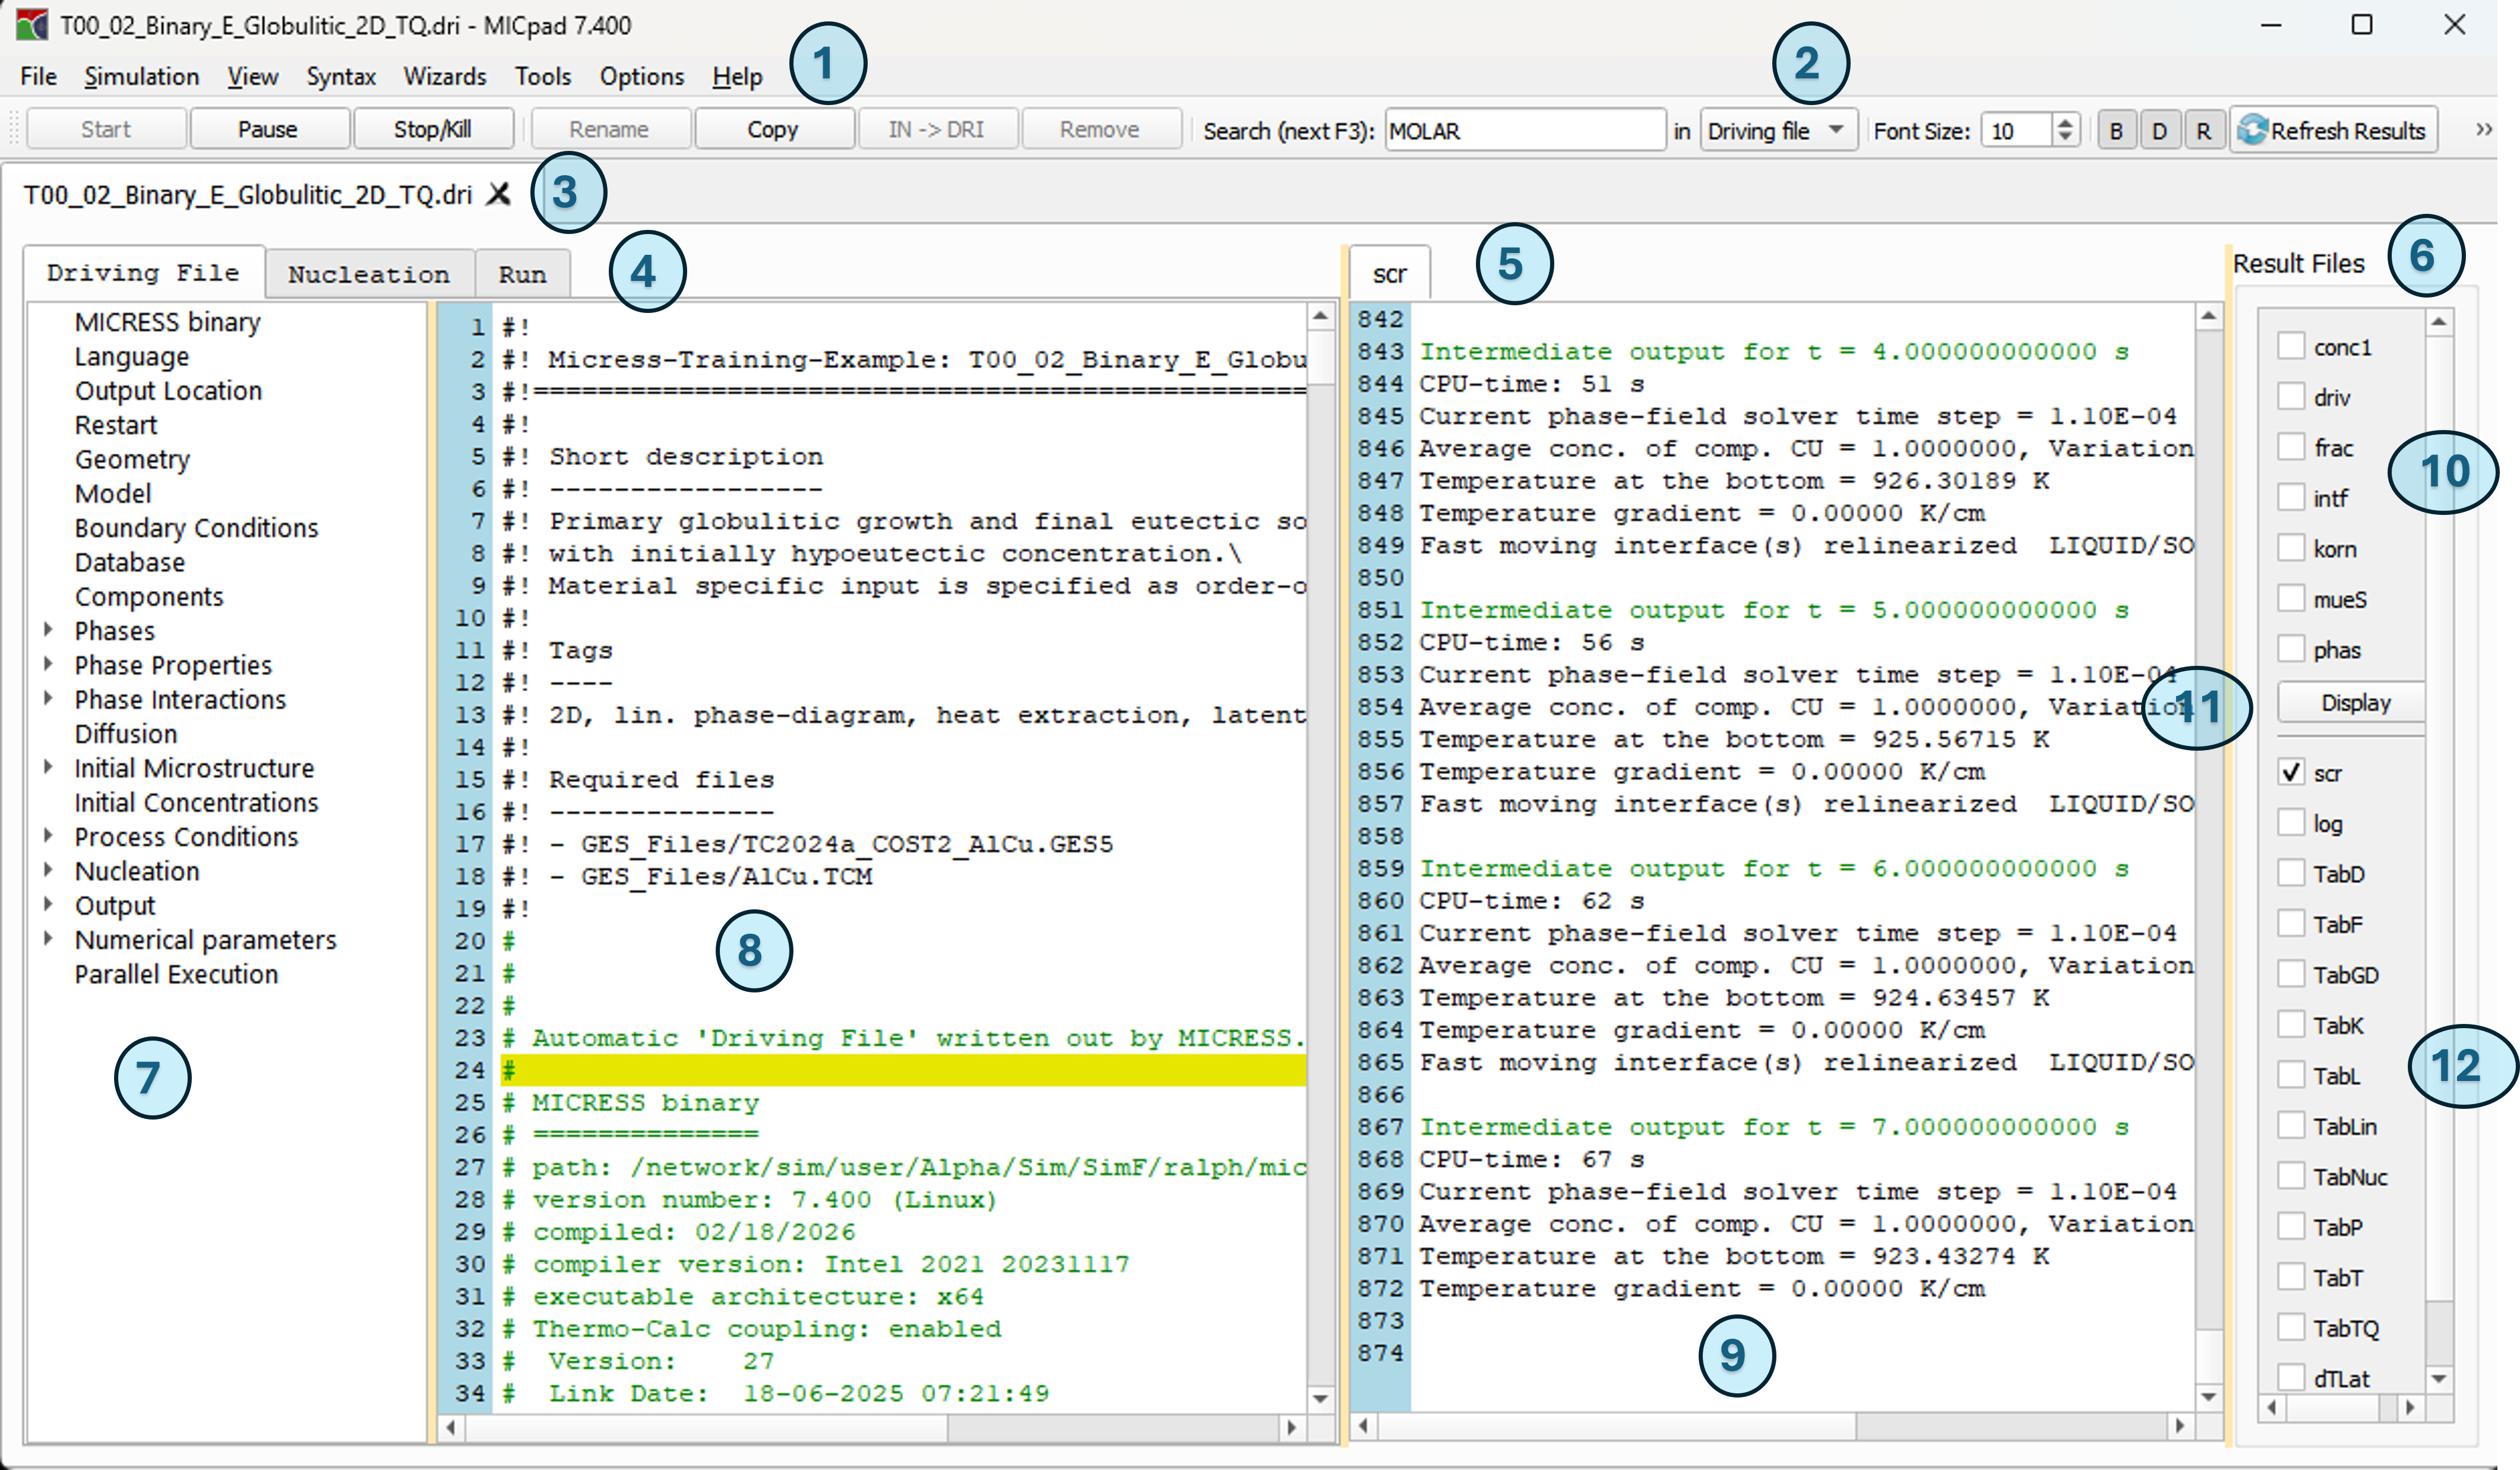
The screen of MICpad is organized in the following sections:
-
You will find a description of each entry of the main menu in this manual:
- File is a good point to start with opening an example driving file Examples
- Simulation: start/stop simulations, refresh results, display results
- View: light/dark mode, toggle windows on/off
- Syntax: check the syntax of a driving file
- Wizards: getting started by using a solidification wizard
- Tools: linearized phase diagrams and anisotropy functions
- Options
- Help
-
A lot of usual task can be done directly with the Toolbar.
-
Each opened file will get a tab here. The tabs can be rearranged by drag and drop of the title.
-
The sub tabs Driving File, Nucleation and Run are named and designed to cope with typical MICRESS input files.
-
Text result files can be shown here. Depending on the type of results, files will be shown as a table or pure text. There is a context menu available (right mouse click).
-
The Result file list contains all results belonging to your simulation input. Only the file extensions are shown (see /micress/#output).
-
The Bookmarks are indeed the headers of your input file sections and ease navigation.
-
The main editor for the opened file. It has a context menu to facilitate some actions (right click).
-
The read-only presentation of text or tabular results. It also has a context menu (right click).
-
The upper section of the result list contains the files for field results.
-
The Display button will open all checked field results with the 2D viewer DP_MICRESS.
-
The lower section of the result list contains all text and tabular result files. A checked file will be opened directly in MICpad.